Log in for the first time
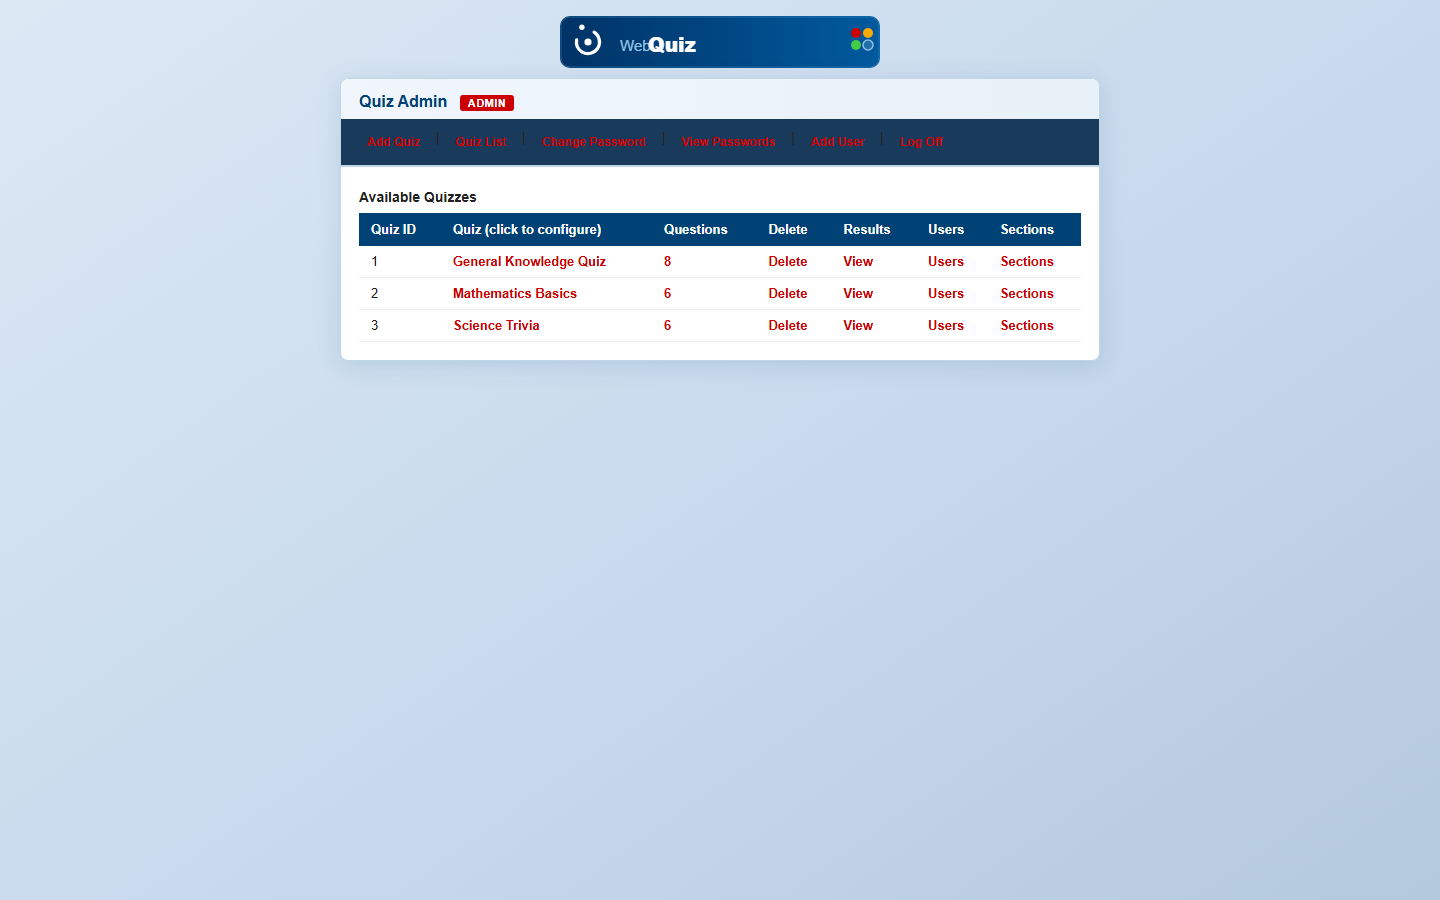
Your welcome email has your admin username, password, and organisation login link. Log in and you land on the quiz list — empty until you add your first quiz below.
- The top nav (Add Quiz, Quiz List, Change Password, View Passwords, Add User, Log Off) is available from every admin page
- Each quiz row shows its question count and links straight to Questions, Results, Users and Sections
- Everything here is scoped to your organisation only — no other org's data is ever visible
Create your first quiz
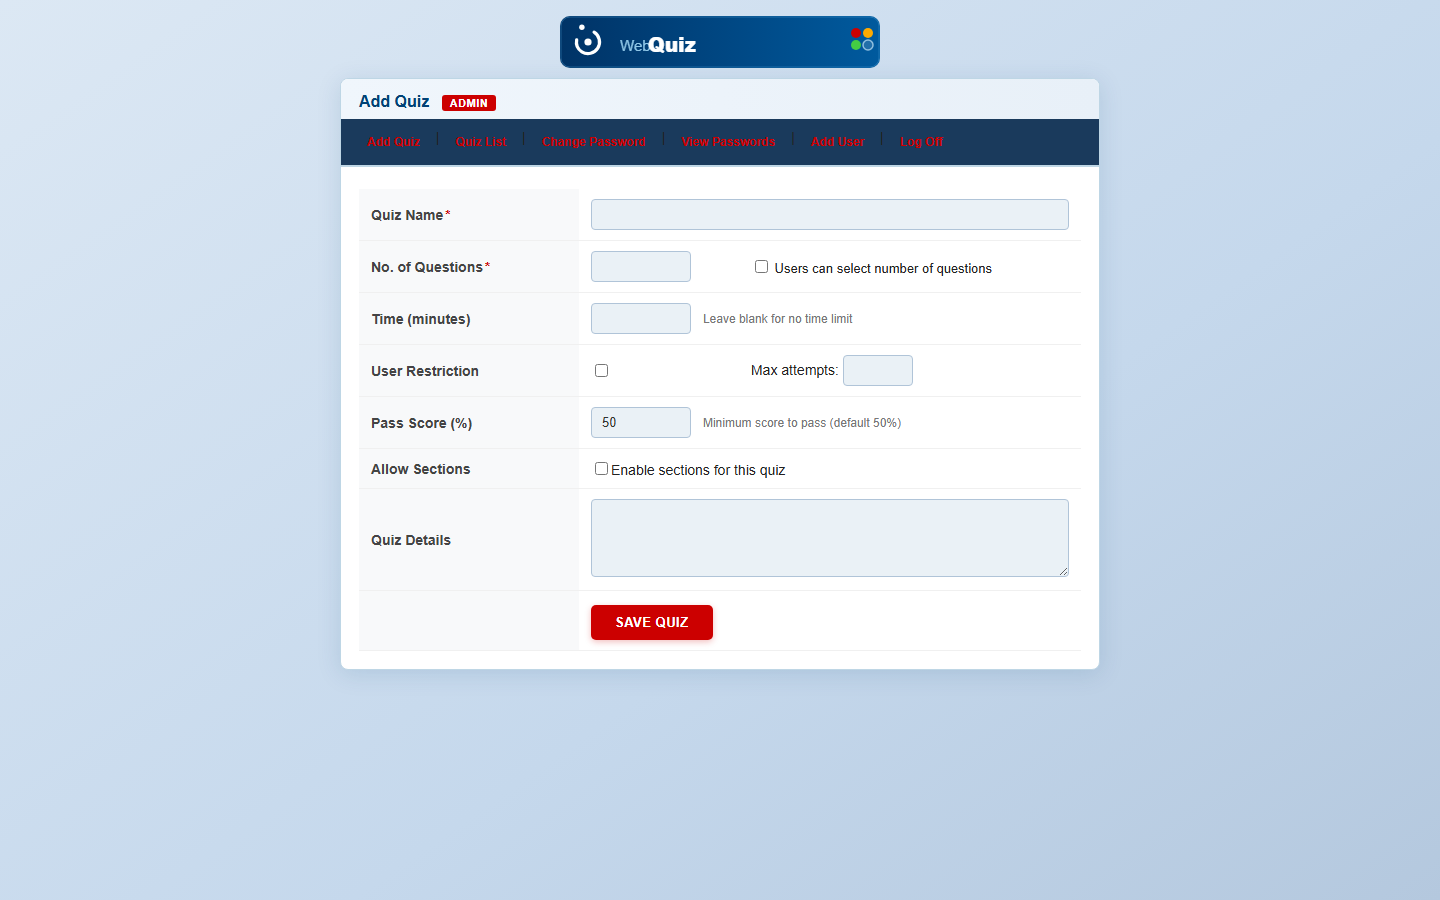
Add Quiz is where every quiz starts — name it, set how many questions it draws, an optional time limit, and a pass score.
- Leave Time blank for no limit, or set minutes to enforce a countdown
- "Users can select number of questions" lets each test-taker choose a shorter run
- Enable Sections here if you want the quiz split into scored sections later
Build your question bank
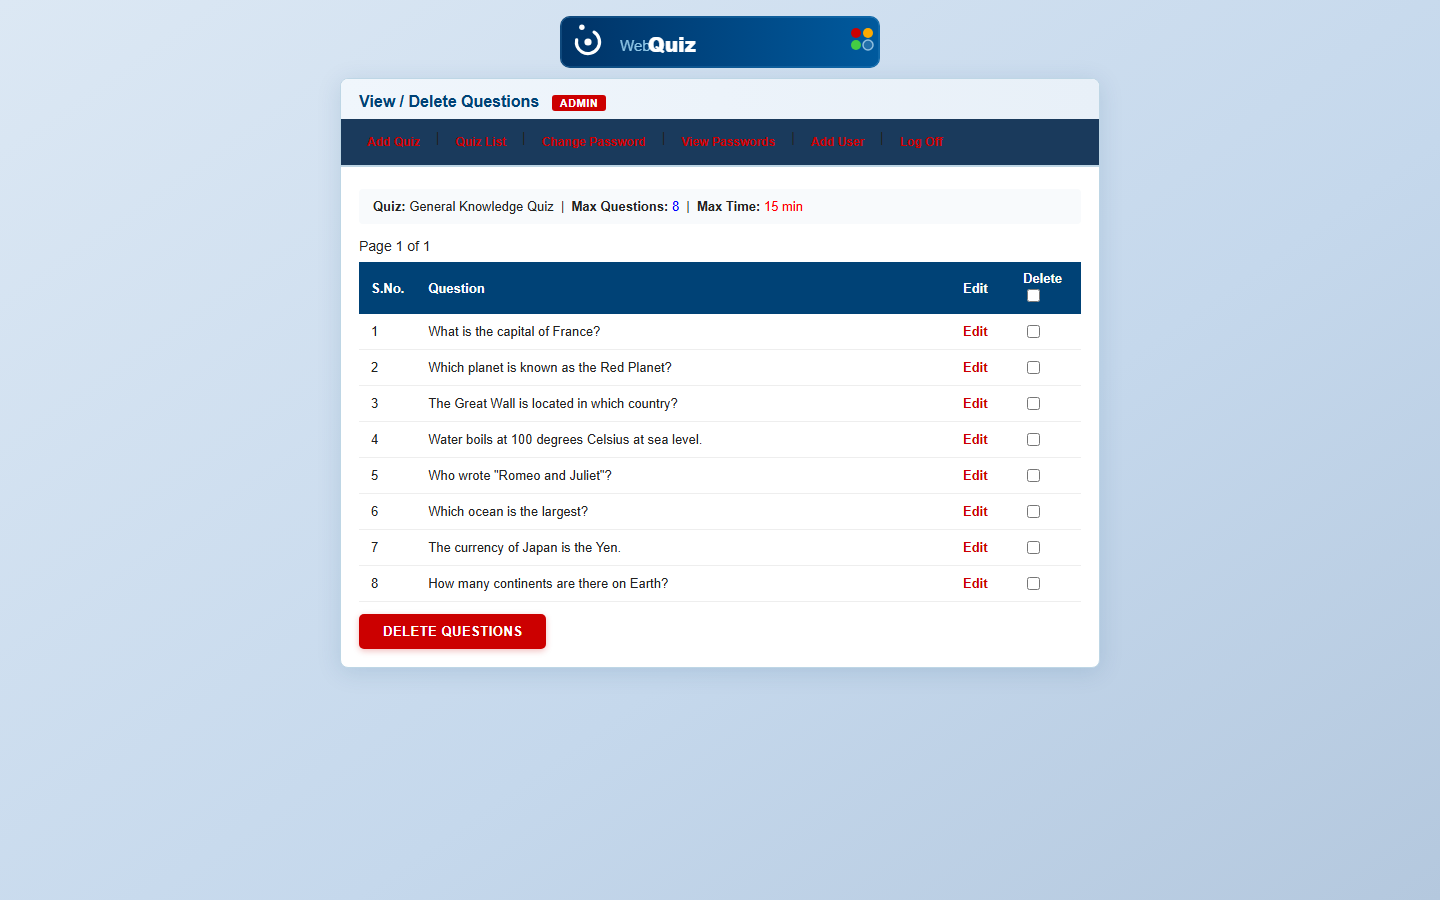
Add questions to the quiz you just created — multiple choice, true/false, fill-in, or multi-select. This page lists, edits and deletes them afterward.
- Each row shows the question text with a direct Edit link
- Checkboxes let you bulk-select and delete outdated questions
- Max Questions and Max Time for the quiz are shown at the top for reference
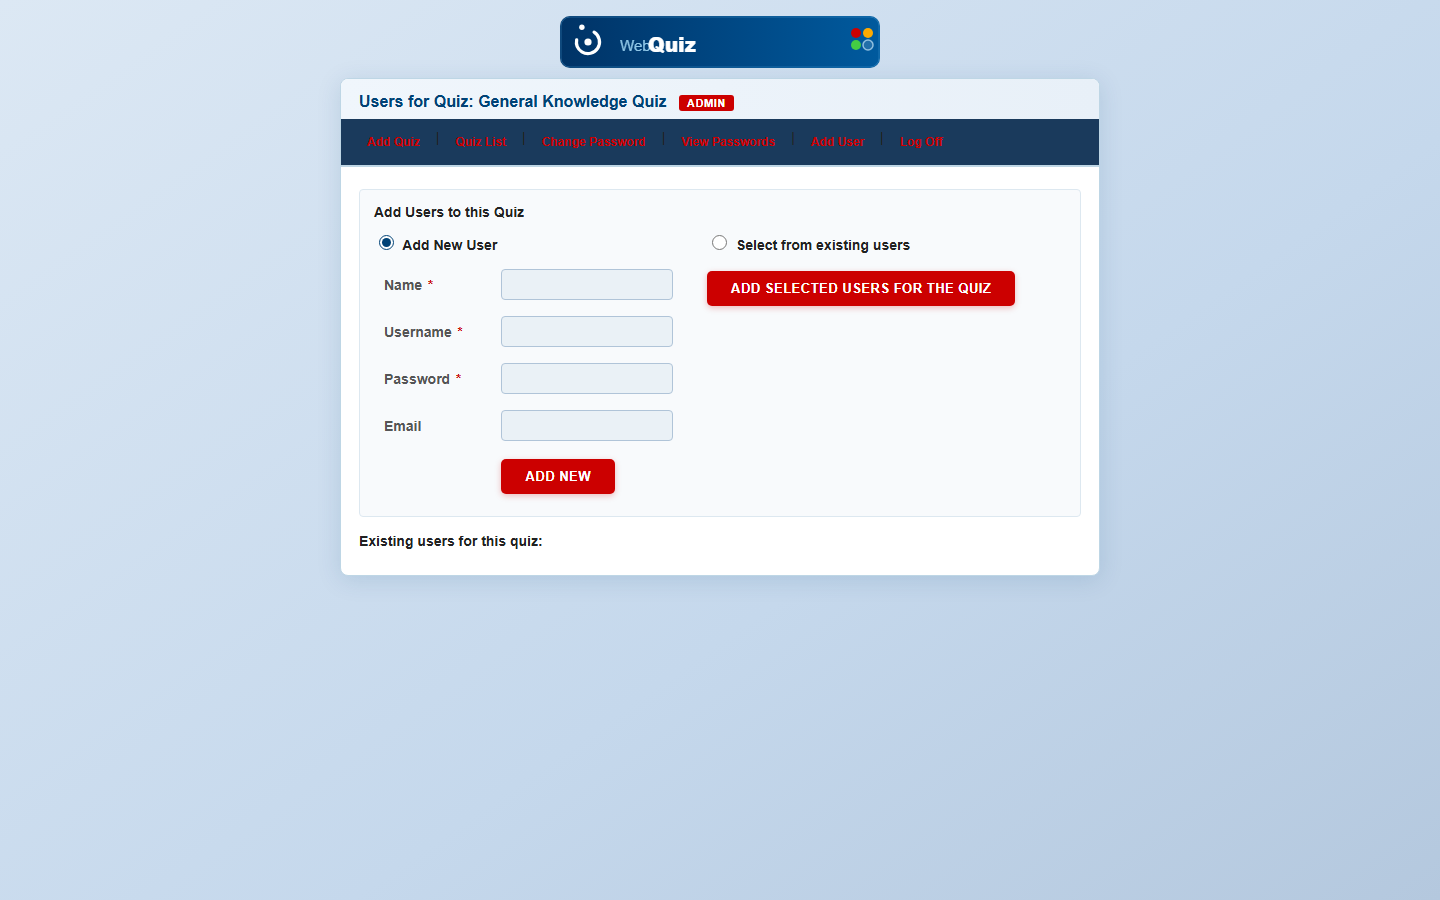
Add users to your quiz
Give people access to take the quiz — add a brand-new user on the spot, or attach someone already registered in your organisation.
- "Add New User" creates a username, password and optional email in one step
- "Select from existing users" reuses accounts already created for other quizzes
- The existing-users list at the bottom shows everyone already attached to this quiz
What your users see
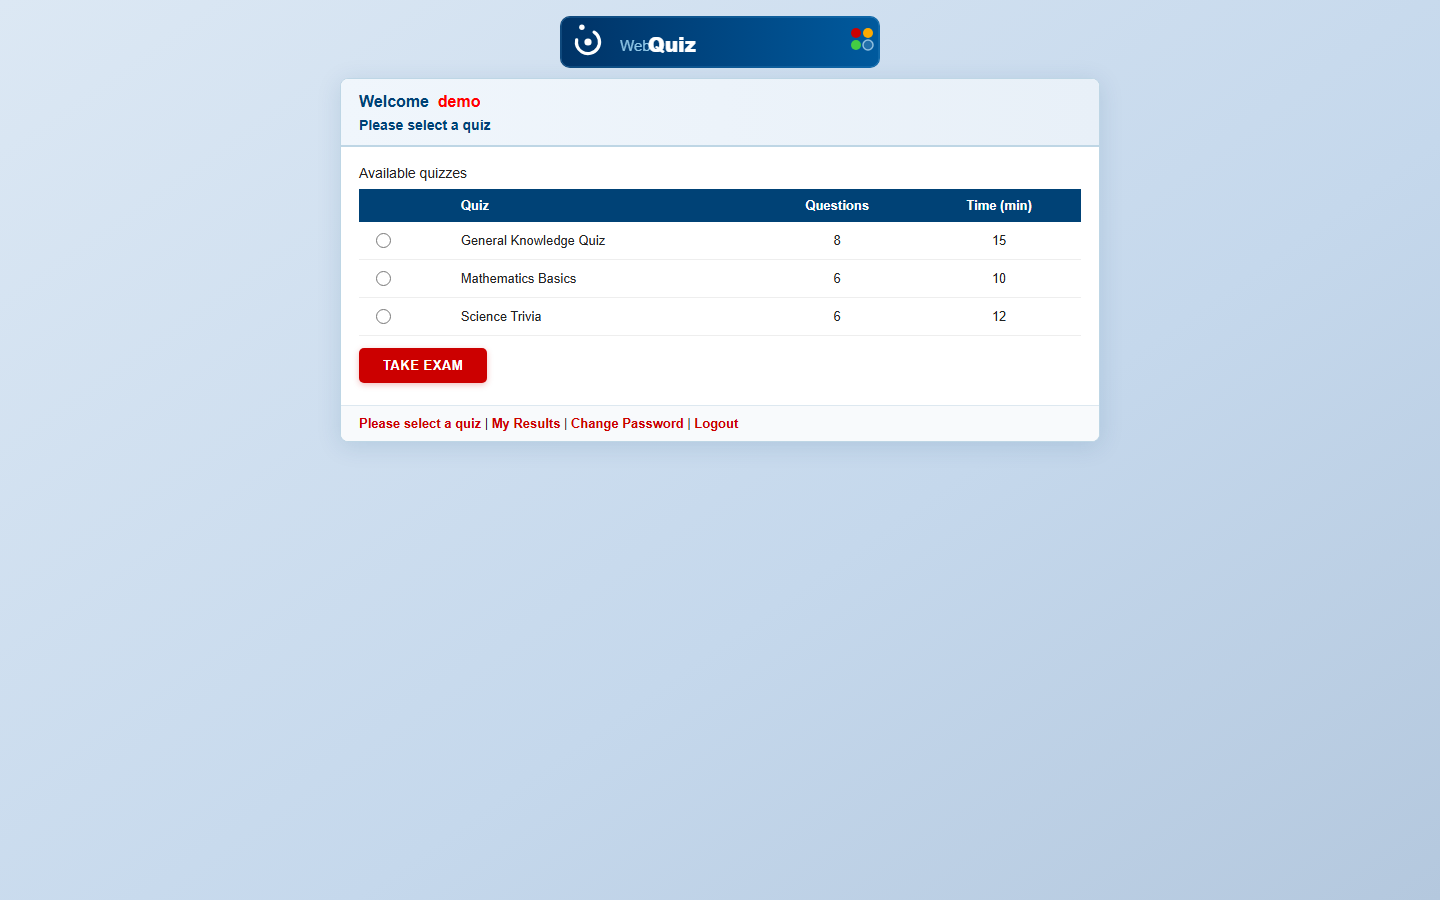
Once added, a user logs in to their own portal, picks from the quizzes assigned to them, and starts the exam — this is the exact screen they'll see.
- Only quizzes that user has been added to (Step 4) appear in their list
- Question count and time limit are shown up front, before they commit to starting
- "My Results" and "Change Password" are self-service, right from the same menu
Review results
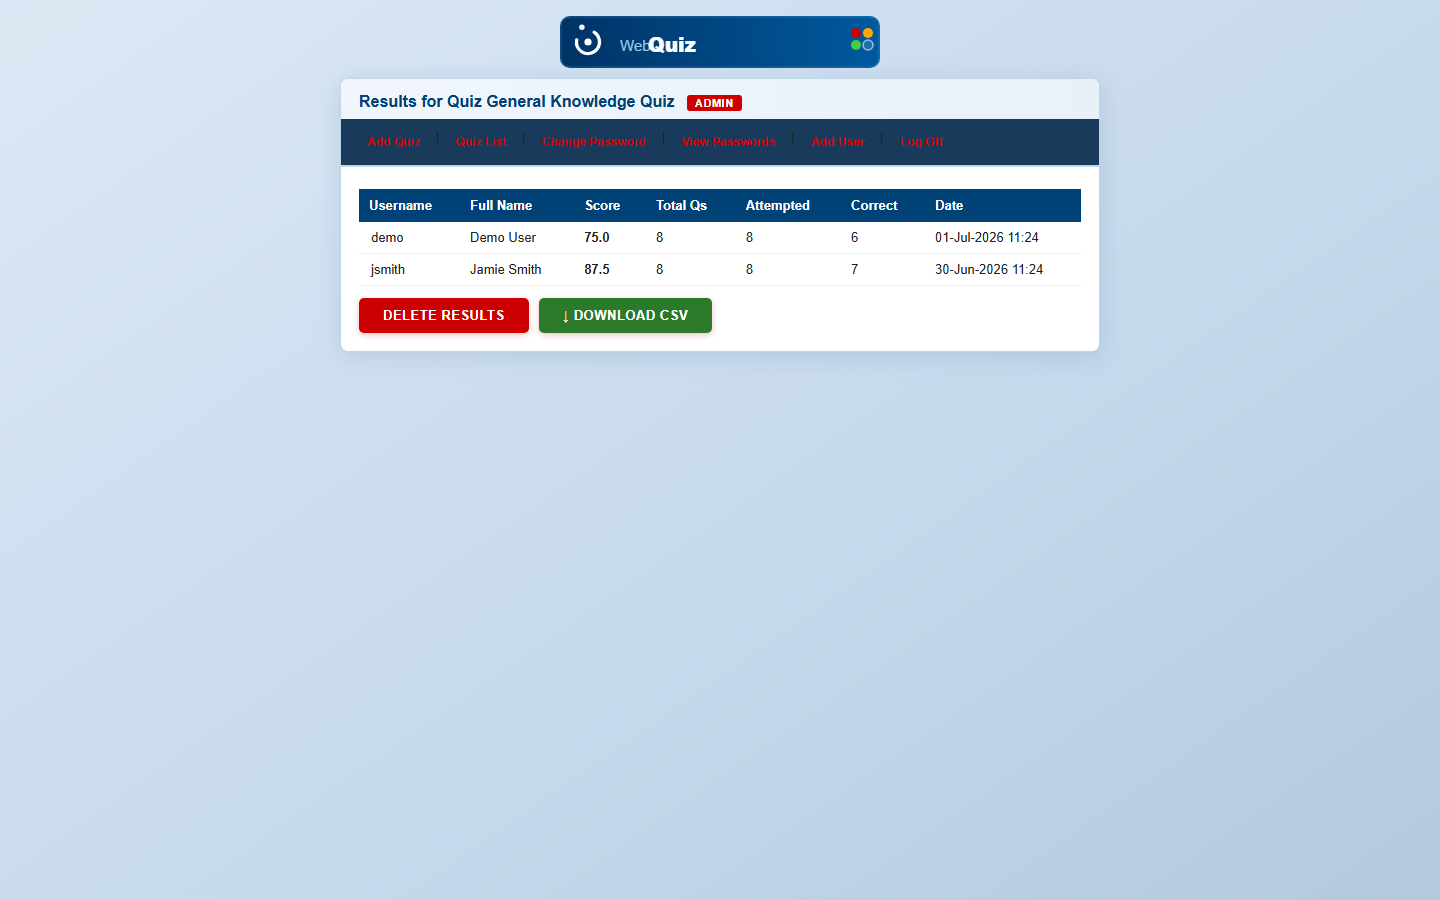
Every attempt lands here — score, questions attempted, correct answers and the exact date, per user, for the quiz you're viewing.
- Download CSV exports the full table for grading records or a gradebook import
- Delete Results clears attempts if you need to let someone retake a quiz
- This is the page you'll come back to most once quizzes are live